|
|
|
Continued...
![]()
| After drilling all holes and screwing down the controls it was time to tackle the wiring. I initially used solid core wiring from twisted pair LAN cable. I learned the hard way that the wire is brittle and breaks easily. Eventually I had to switch over to stranded wire which has been trouble free. |

|
| For this project I decided to do a keyboard hack. I've since built my own keyboard encoder that blows the keyboard hack away. At the top of the picture on the right, you'll notice a daughter board that's attached to the keyboard with 2 pieces of ribbon cable. That board is the keyboard encoder. The ribbon cable leads to a matrix on the keyboard PCB (printed circuit board). I cut the ribbon cable holding the encoder board. |

|
| After separating the encoder board, I de-soldered the ribbon cable leads and soldered in pieces of stranded wire. It looks like a horrible mess in the picture but I cleaned it up considerably by putting connectors on each wire and screwing them into a terminal block from Radio Shack. |

|
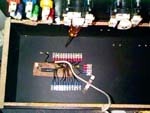
| At the center of this picture you can see the keyboard encoder, nicely wired and screwed down. Wires leading to the controls are screwed down into the terminal blocks to make the connection. To determine which combination of shorting pins together produced which key, I tried every combination and made a table. Then I selected the keys I wanted to use and connected my controls. |

|
| Continued |