|
|
|
Cost: Approx. $75.00
Obtained From: Built From Scratch
Condition: N/A
Current Status: Being dismantled and placed into a MAME cabinet.
![]()
The purpose of this project was to create a moveable control panel that would have arcade quality controls. I didn't have a cabinet at the time I built this so I figured that at least I'd have this project under my belt when I tackled my first cabinet.
I wanted to have a 2 player setup with 2 8-way joysticks, 6 buttons per player and a trackball. After realizing how horrible an 8-way joystick performed on 4-way games like Pengo and Pac Man, I decided to add a 4-way stick as well.
All controls for this project came from Happ Controls although I'm not as happy with the joystick length as I'd like. I think I prefer the nice short sticks with a round ball on top. The throw is shorter, which translates into better responsiveness.
I also purchased some parts from Radio Shack for this project. I used 3 spst momentary contact switches for the tab, escape and coin-up keys. Later I put a light under the trackball and used a transistor and battery holder from Radio Shack. And let's not forget the stranded wire, solder, soldering iron and de-soldering tool either!
Home Depot was the source of bolts, locknuts (vinyl inserts), hinges, a window latch and a flashlight that I tore apart to put under the trackball. I purchased some tools from Home Depot, which included several hole saws.
The trackball cover plate was made from a black plastic clipboard that I purchased at Wal Mart.
The wood came from a stereo cabinet that I found laying outside of an abandoned rent-a-center. It was a pioneer stereo cabinet made of fiber board and covered with black, wood grained vinyl.
The keyboard I hacked was laying around the house collecting dust. A new one could have been purchased for $11.00.
The tools required were: my table saw, an electric drill, 1 drill bit, 2 hole saws, an exacto knife, phillips screwdriver, glue gun, ruler, open ended wrench, vice grips, de-soldering tool, soldering iron, push pins and of course pencil and paper! The final tools you'll need when tackling a project like this is a clear mind and lots of patience!
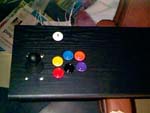
The first step in getting started was to cut up the stereo cabinet and assemble it into a box. I settled on a width of 36" and it turned out to be perfect. 36" is wider than most arcade control panels but this wasn't going into an arcade machine! The wood was cut to size on my table saw screwed together. Most of the hardware for assembling the box was recycled from the stereo cabinet. I used 2 hinges bought at Home Depot and a window latch to attach the top. I didn't take a picture of the box before putting in the controls, but here's a shot of the final product.
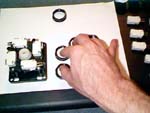
| Now that I had a box it was time to lay out the location for my controls. I started by putting part of a joystick upside down on a piece of paper, along with 6 button retaining rings. I also set out a retaining ring for the player 1 start button. If you're interested in looking, this is a picture of some disassembled controls. |

|
| To place the buttons ergonomically, I put my fingers inside the button retaining rings and moved them around until I was comfortable. |

|
| After placing the controls where I wanted them, I traced around and inside them using a pencil and removed them. Then I placed the paper on top of the control panel surface and used pushpins to mark the center point for each control. This allowed me to remove the paper and see the pin hole underneath on the wood. |

|
| The next step was to remove the pins and paper and drill the holes. All holes were drilled with a 1 1/8" diameter hole saw. I wish you good luck in finding one because 1 1/8" isn't a very standard size! To make the holes nice and clean, drill halfway on one side of the board and then flip it over to finish the hole from the other side. This also helps prevent the hole from getting stuck in the saw. |

|
| After drilling I cleaned the edges of each hole (top and bottom) with sandpaper. This isn't really necessary but I'm a perfectionist. After inserting the controls the panel looked very nice. Now I just had to do player 2 and the trackball! |

|
| Continued |